Overview
Moving vending machine equipment doesn’t have to be a headache. You know how it goes—planning is key. Start by gathering the right tools and laying out a structured process for loading, transporting, and installing the machine at its new home.
Here’s the thing: before you dive in, take a moment to assess the new site. It’s crucial to use heavy-duty equipment to handle the load, and don’t forget to keep the lines of communication open with everyone involved. This way, you’ll minimize damage and stay in line with local regulations throughout the whole relocation process.
So, what’s the takeaway? Just remember: a little planning goes a long way in making your move smooth and hassle-free.
Introduction
Moving vending machine equipment might feel a bit overwhelming, right? I mean, just think about the weight and complexity of these machines. But here’s the good news: with the right prep and tools, you can make this process safe and efficient. In this guide, we’ll explore some essential steps that not only make your move smoother but also protect your equipment from damage. So, what are the common pitfalls that could turn a simple move into an expensive headache?
Plan and Prepare for the Move
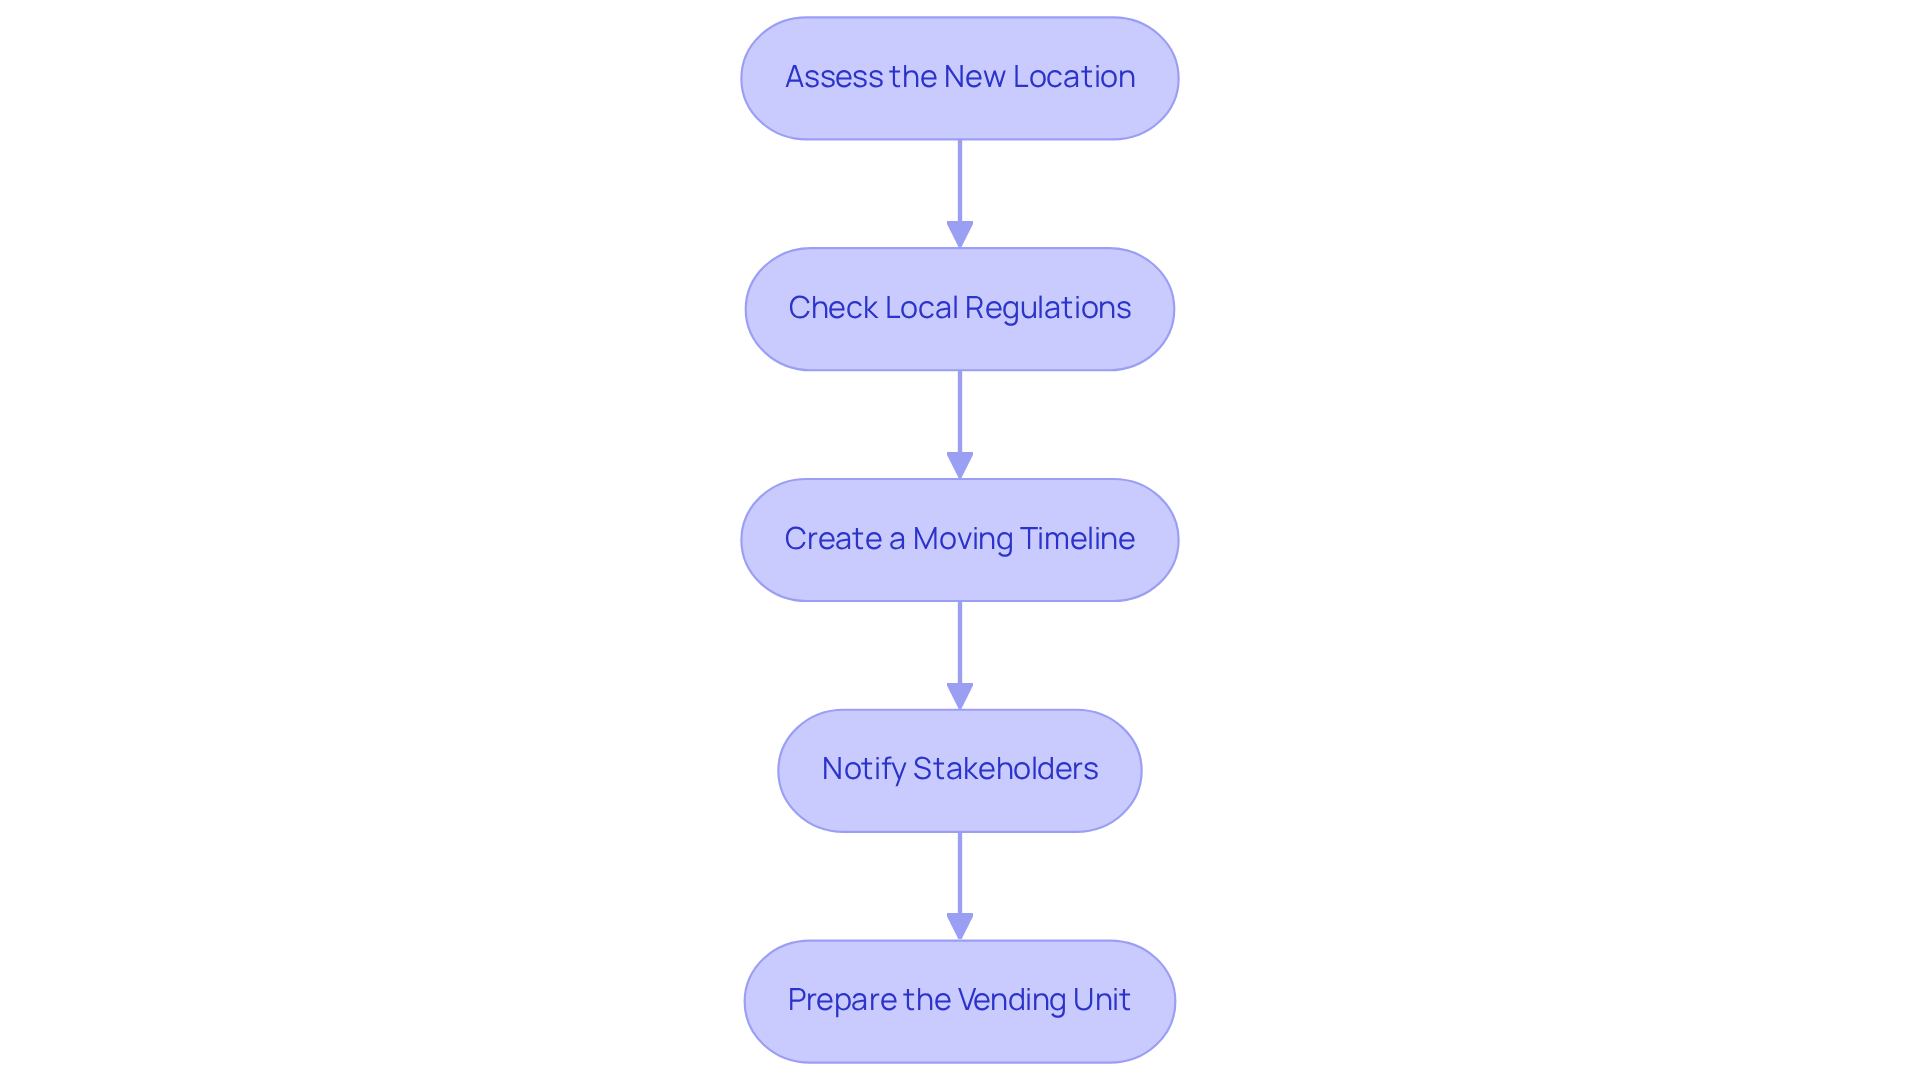
- Assess the New Location: So, before you dive into the move, take a good look at your new spot. Check out how accessible it is, how much space you’ve got, and whether there’s a reliable power supply. You want to make sure it can handle the size and weight of your device, along with any utilities you’ll need to keep it running smoothly.
- Check Local Regulations: Here’s the thing: you need to make sure you’re on the right side of the law. Look into any local permits or rules for setting up a kiosk in your new location. This means getting familiar with zoning laws and property management guidelines that could impact your installation. As we roll into 2025, staying compliant is key to dodging fines or relocation headaches.
- Create a Moving Timeline: Let’s break it down — a detailed timeline can be your best friend here. Outline each step of the move, from packing to transportation and finally installation at the new site. This organized approach will help keep things efficient and minimize downtime for your vending device.
- Notify Stakeholders: Don’t forget to keep everyone in the loop! Inform all relevant parties, like property managers or business owners, about your planned move. This kind of communication builds cooperation and helps avoid conflicts during the relocation, making for a smoother transition.
- Prepare the Vending Unit: Before you hit the road, clear out the unit. Remove all items and coins to lighten the load and prevent any damage. Secure any loose parts to avoid losing them during the move. This prep work is crucial for and ready to go at the new location.

Gather Essential Equipment
When it comes to moving vending machine equipment, collecting the right gear is key to keeping everything safe. Let’s break down what you’ll need:
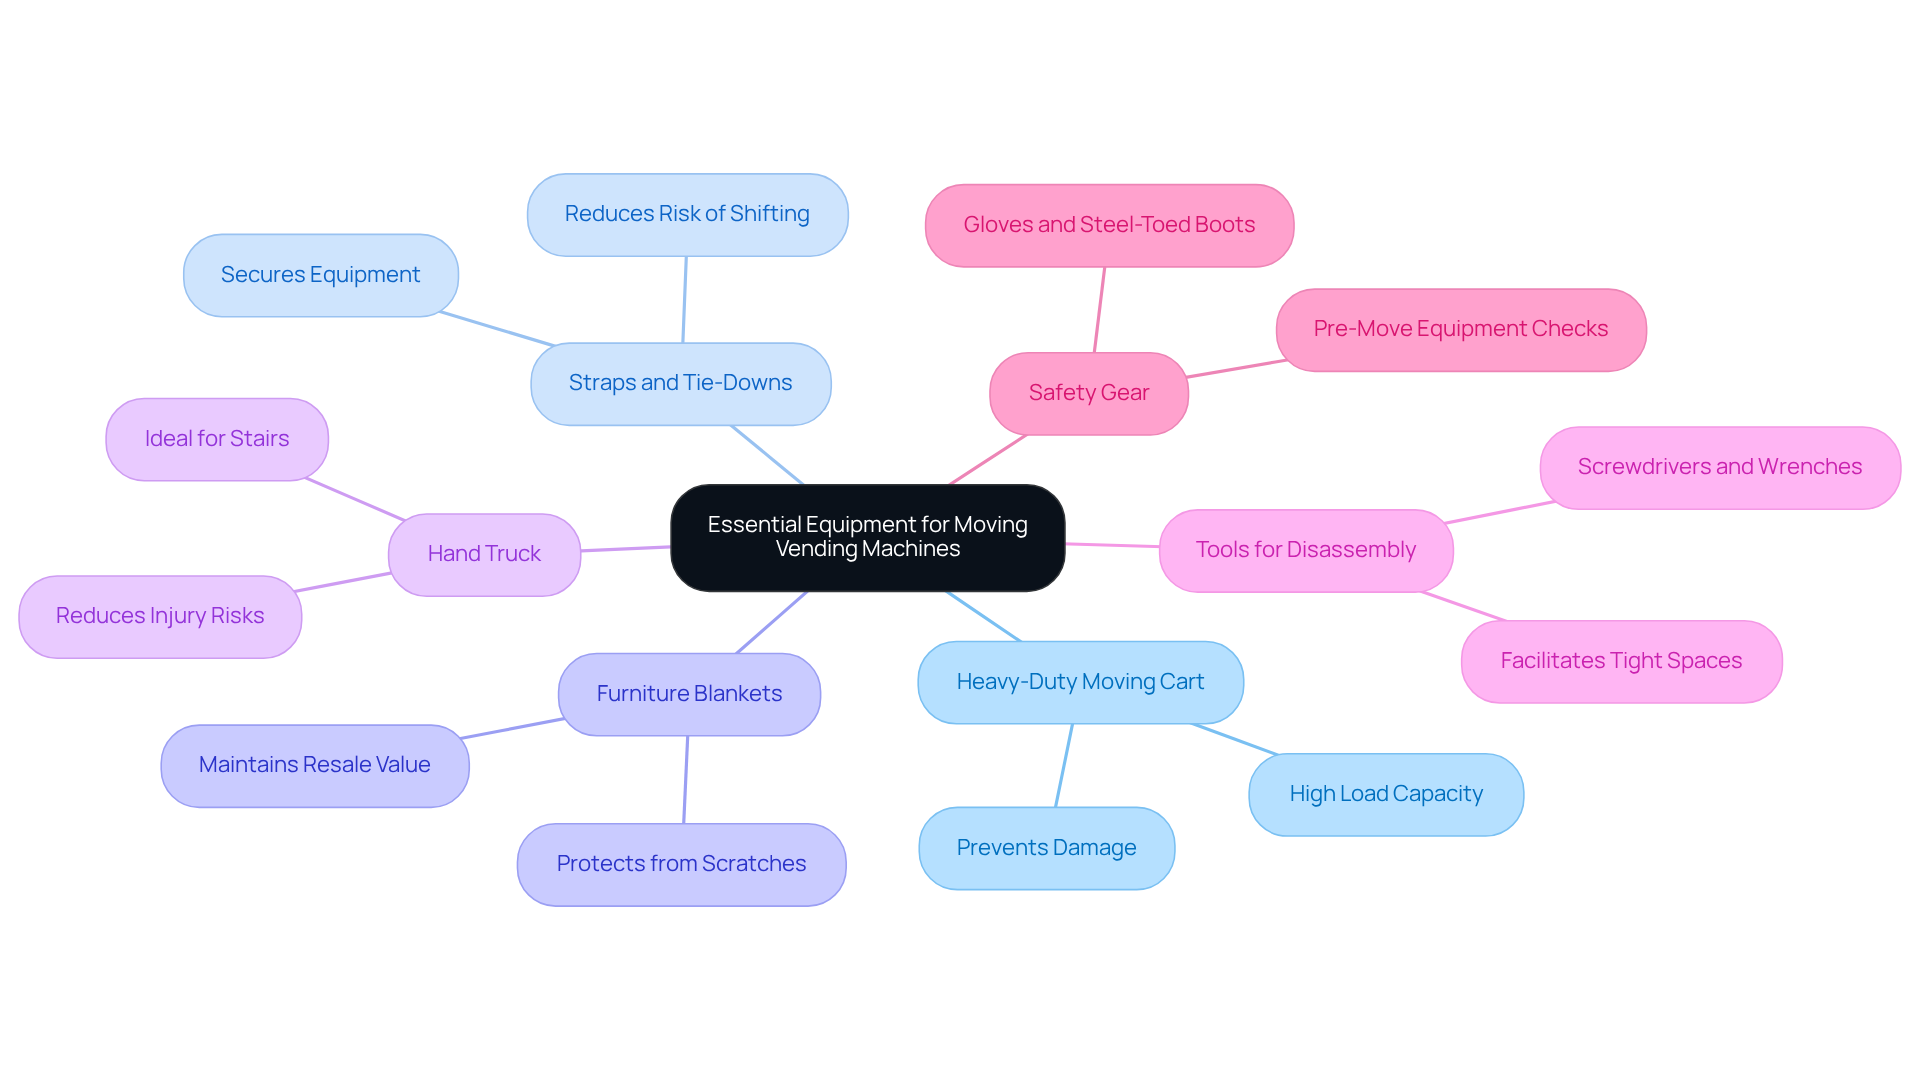
- Heavy-Duty Moving Cart: You really can’t go wrong with a specialized cart for transporting snack dispensers. These carts often have a higher load capacity, with some models handling up to 1,400 lbs. Just think about it: if your dispenser weighs 1,000 pounds, using a dolly rated for only 500 pounds is a recipe for disaster. So, picking the right equipment is crucial.
- Straps and Tie-Downs: Don’t forget the appliance straps! They’re a must for securing the device while it’s on the move. Properly strapping down the kiosk means it won’t shift or fall over, which is super important for keeping it intact. Pros will tell you that using quality straps can really cut down on the risk of damage.
- Furniture Blankets: Wrapping the vending unit in furniture blankets is a simple but effective way to protect it from scratches and dents during transport. This little step can help keep it looking sharp and maintain its resale value.
- Hand Truck: A hand truck is your best friend when navigating stairs or uneven surfaces. If you’re dealing with multi-floor locations, stair-climbing dollies can reduce injury risks by up to 62% compared to carrying it manually. Safety first, right?
- Tools for Disassembly: It’s a good idea to have screwdrivers and wrenches handy. You never know when you might need to to fit the device through tight spaces or doorways.
- Safety Gear: Everyone involved in the move should wear safety gear like gloves and steel-toed boots to avoid injuries. Plus, it’s smart to check your moving equipment before each use to keep everyone safe.
By using these tools and strategies, property managers can make the process of moving vending machine equipment smoother and safer. This not only minimizes damage but also boosts operational efficiency. And here’s the thing: investing in high-quality relocation tools is becoming more important. The market for merchandise transport carts is expected to grow at a CAGR of 5.8% until 2028, currently valued at $850 million. So, let’s get moving!

Load and Transport the Vending Machine
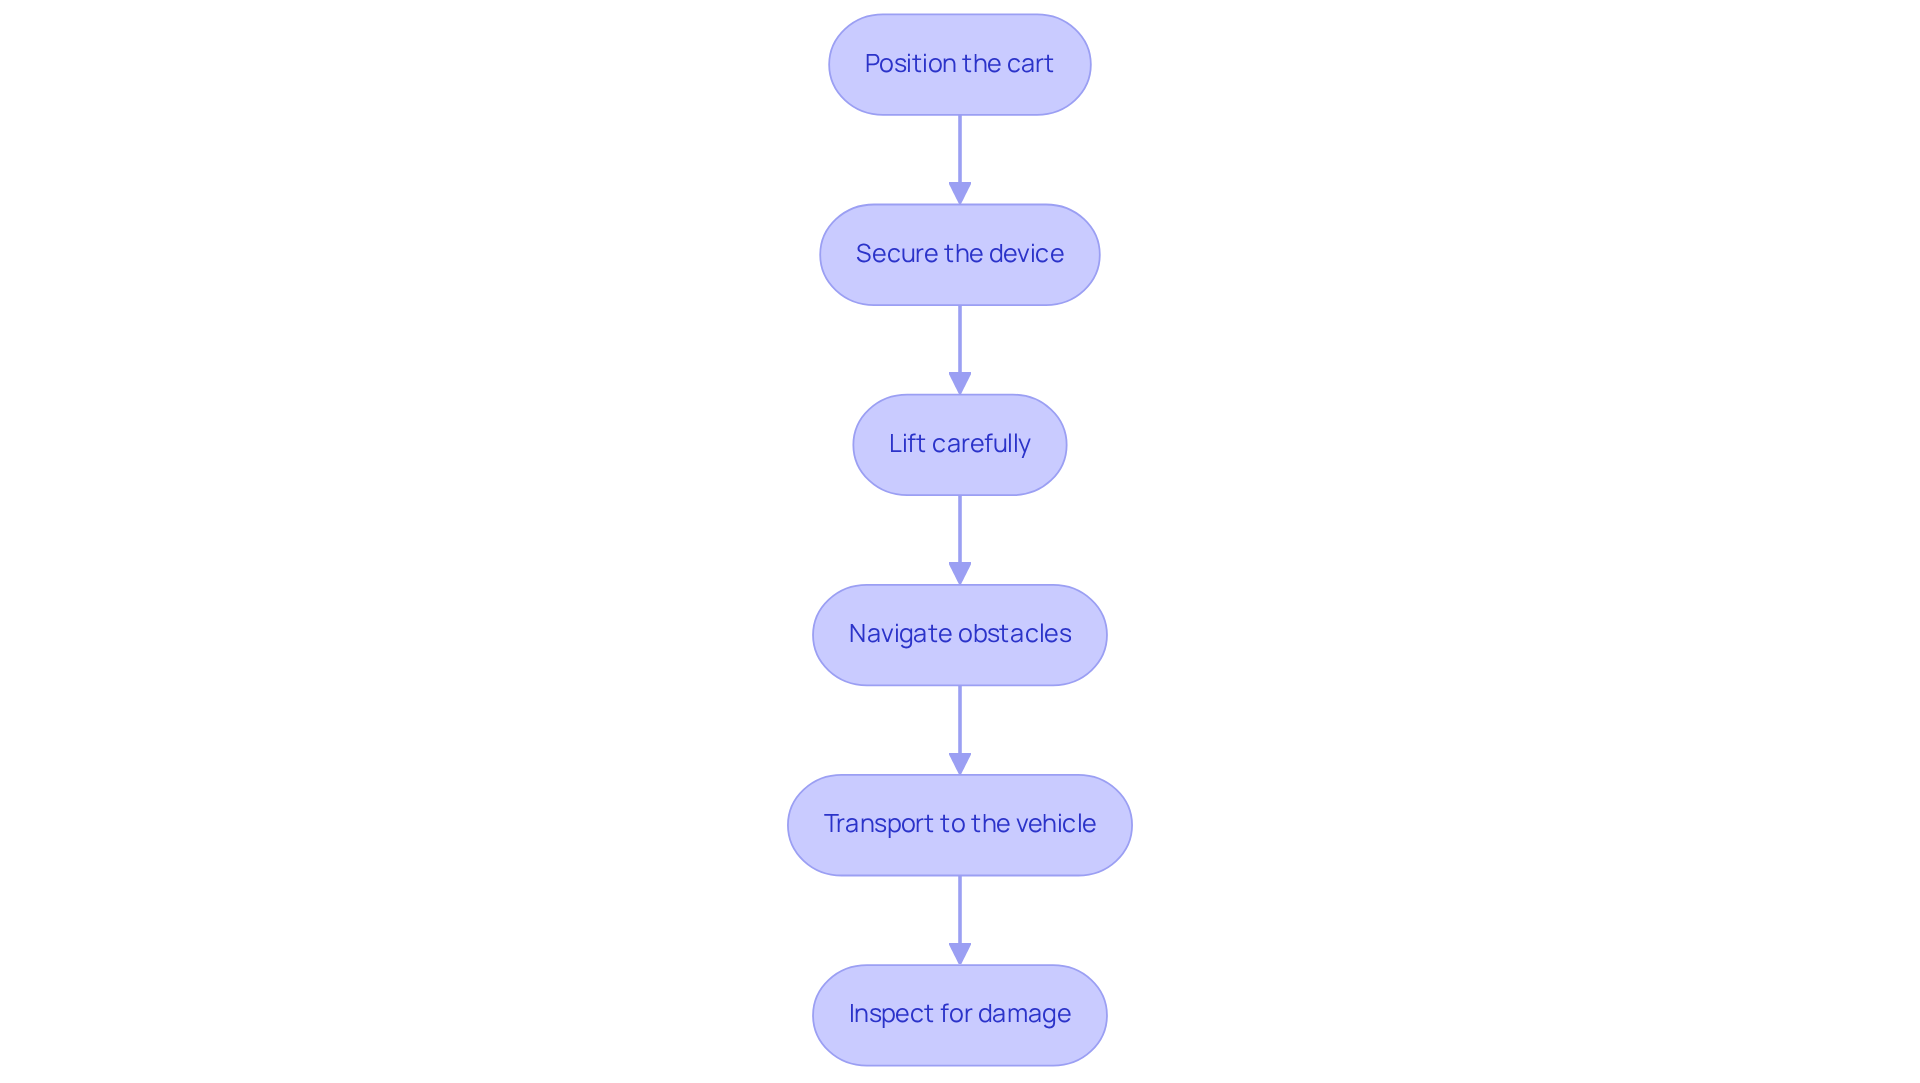
- Position the cart: So, let’s kick things off by angling the dispenser a bit and sliding the cart right underneath it. Make sure the cart is centered to evenly balance the equipment's weight, which usually falls between 400 and 900 pounds, averaging around 640 pounds. Standard dispensers are pretty tall, measuring between 72 to 84 inches high, 30 to 37 inches wide, and 31 to 37 inches deep, which makes moving vending machine equipment a bit tricky.
- Secure the device: Grab some heavy-duty straps and fasten that vending unit to the cart tightly. This step is super important for moving vending machine equipment to ensure everything stays in place during transport—nobody wants any bumps or bruises.
- Lift carefully: Here’s the thing: you’ll want one person at the bottom and another at the top to lift the device onto the cart. To avoid any injuries, especially given how can be, use proper lifting techniques.
- Navigate obstacles: Now, as you’re moving, be careful going through doorways and around corners. If you hit any stairs while moving vending machine equipment, it’s best to use a hand truck or get some extra help to manage that weight safely and keep everything stable.
- Transport to the vehicle: Once you’re outside, load the dispenser into your transport vehicle. If you have a ramp, use it—it makes loading way easier. Secure the moving vending machine equipment with straps to prevent it from shifting during the ride. And hey, if you can, consider hiring skilled movers. They know how to handle big, fragile items like snack equipment. When you arrive, don’t forget to check the snack dispenser for any damage and jot down any issues to report to the supplier. Proper preparation and securing techniques are key for a smooth transport—because let’s face it, nobody wants to deal with costly damages.

Unload and Install at the New Location
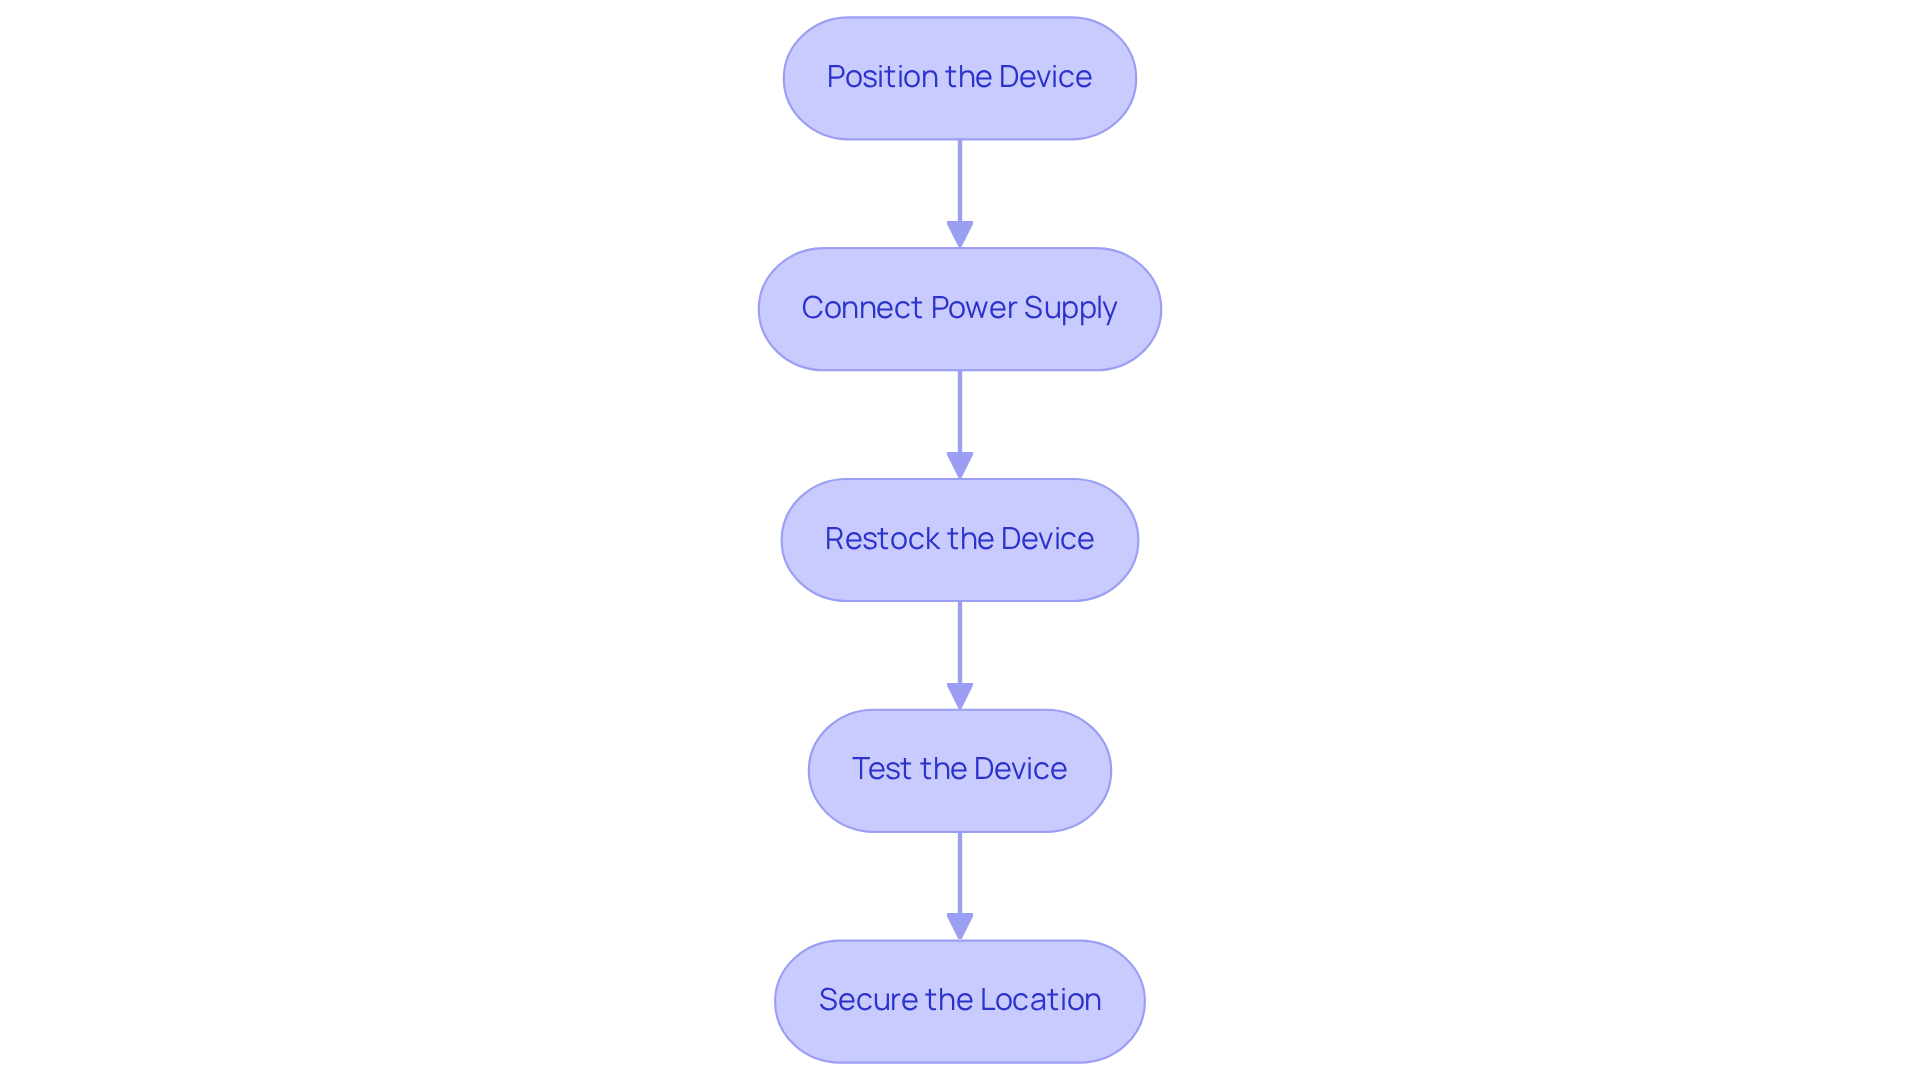
- Position the device by carefully unloading the moving vending machine equipment from your vehicle and setting it down in the spot you’ve chosen. Make sure it’s level and stable—this helps avoid any operational hiccups down the line.
- Connect Power Supply: Next up, plug the device into a power source that’s compatible. Double-check that the outlet meets the device's electrical needs to steer clear of any malfunctions.
- Restock the Device: Once it’s in place, it’s time to restock the machine with products. Don’t forget to fill the coin mechanism with change so it’s ready for customers.
- Test the Device: Now, let’s run a test transaction. This is key to making sure everything’s working as it should. You want to ensure all items dispense properly and that the payment system is functioning correctly. Operators often stress how important this step is—thorough testing can really help prevent future issues and boost customer satisfaction.
- Secure the Location: If it’s needed, secure the machine to the floor or wall to help prevent theft or tipping. This might involve using brackets or other methods that comply with local regulations for moving vending machine equipment. Many operators recommend this precaution since it significantly lowers the risk of damage or loss. Plus, consider checking out Vending Village’s secure marketplace for pre-approved vending locations. You’ll be working with verified sellers and get a if the location doesn’t meet your expectations.

Conclusion
Moving vending machine equipment isn't just about lifting and shifting; it takes some careful planning and execution to make sure everything goes smoothly. By following the essential steps in this guide, you can minimize risks and streamline the moving process. This way, you’ll set yourself up for a successful relocation of your vending machines.
First off, think about the new location. Is it accessible? Does it comply with local regulations? These are key aspects to consider. Plus, creating a detailed moving timeline can make a world of difference. You want to be organized, right?
Now, let’s talk about the right tools. Having proper equipment like heavy-duty carts and safety gear is crucial. They’ll help you facilitate a smooth move. And don’t forget the steps involved in loading, transporting, unloading, and installing the vending machines. Each phase needs to be approached with care to avoid any damage or operational hiccups.
Here’s the thing: moving vending machines is more than just relocating them; it’s about protecting your investment and keeping your service running smoothly. By sticking to best practices and using the right tools, you can boost your efficiency and cut down on potential losses. Embracing these strategies not only helps with the successful installation of your machines but also builds a more reliable service for your customers.
So, take a moment to plan and prepare effectively. It can truly make all the difference in achieving a seamless transition.
Frequently Asked Questions
What should I assess before moving to a new location?
Before moving, assess the accessibility of the new location, the amount of space available, and the reliability of the power supply to ensure it can accommodate your device and necessary utilities.
Why is it important to check local regulations before moving?
Checking local regulations is important to ensure compliance with permits, zoning laws, and property management guidelines, which can help avoid fines or relocation issues.
How can I create an effective moving timeline?
Create a detailed timeline that outlines each step of the move, including packing, transportation, and installation at the new site, to keep the process organized and minimize downtime for your vending device.
Who should I notify about my planned move?
Notify relevant parties such as property managers or business owners about your planned move to foster cooperation and prevent conflicts during the relocation.
How should I prepare the vending unit before the move?
Before moving, clear out the vending unit by removing all items and coins, and secure any loose parts to prevent damage and ensure the equipment is ready for the new location.
List of Sources
- Plan and Prepare for the Move
- How to Choose the Best Vending Sites for Maximum Profit - Vending Locator (https://vendinglocator.com/blog/how-to-choose-vending-sites)
- The Best Locations for Vending Machines (https://naturals2go.com/best-vending-machine-locations)
- The Ultimate Guide to Vending Machine Location Analysis by DFY Vending (https://dfyvending.com/vending-machine-location-analysis-8)
- 360connect.com (https://360connect.com/product-blog/best-locations-for-vending-machines)
- Mall Vending Machines: What It Really Costs to Get In - Vending Locator (https://vendinglocator.com/blog/how-much-does-it-cost-to-put-a-vending-machine-in-a-mall)
- Gather Essential Equipment
- Moving a Vending Machine? Here's the Step-by-Step Guide Pros Use - Vending Locator (https://vendinglocator.com/blog/how-to-move-a-vending-machine-a-complete-guide)
- Vending Mover with 12x39 Air Beams - Airsled (https://airsled.com/product/vending-mover-with-12x39-air-beams)
- Need a Dolly for Vending Machine? Heavy-Duty Solutions Here (https://accio.com/plp/dolly-for-vending-machine)
- 7+ Best Vending Machine Moving Equipment & Tools (https://cb.staging.behrmanhouse.com/vending-machine-moving-equipment)
- HOW TO MOVE A VENDING MACHINE (https://handsonmovingandstorage.com/post/how-to-move-a-vending-machine)
- Load and Transport the Vending Machine
- Transporting Vending Machines with a Small Vehicle: Overcoming Barriers for New Vendors (https://candymachines.com/blog/transporting-vending-machines-with-a-small-vehicle-overcoming-barriers-for-new-vendors?srsltid=AfmBOorq3qm1IAbBbhAjpQCEwswlIxe_Hy6eJqfZhZTQrN0m73dwta1S)
- How to Ship a Vending Machine (https://moveit.com/about/news/2023-06-06-how-to-ship-a-vending-machine)
- Moving a Vending Machine? Here's the Step-by-Step Guide Pros Use - Vending Locator (https://vendinglocator.com/blog/how-to-move-a-vending-machine-a-complete-guide)
- Unload and Install at the New Location
- Nayax (https://allcloud.io/case_studies/nayax)
- A grassroots programme to support a traditional Eastern European community managing traditional High Nature Value landscapes in the Carpathians - The International Partnership for the Satoyama Initiative (IPSI) (https://satoyamainitiative.org/case_studies/a-grassroots-programme-to-support-a-traditional-eastern-european-community-managing-traditional-high-nature-value-landscapes-in-the-carpathians)


